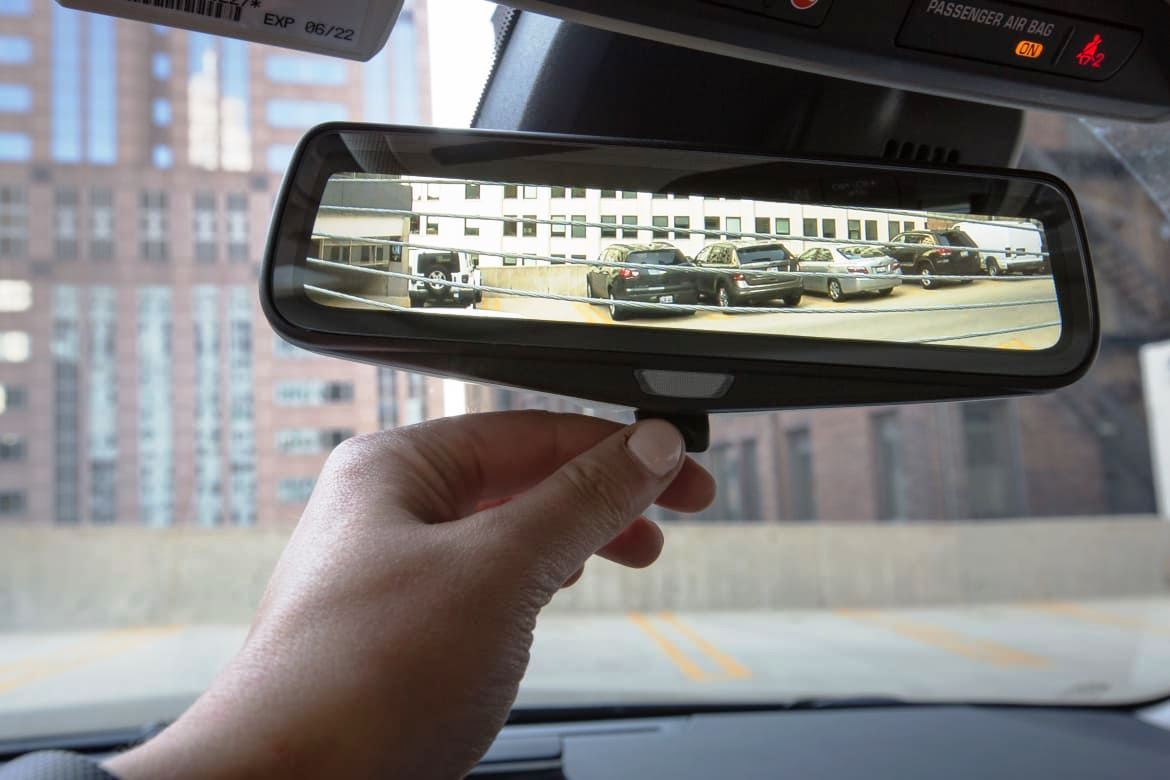
Some cars due to their trim specification may not come with a backup camera. For safety reasons, it’s always advisable to have one installed. Before installation, first and foremost you need to know the market is filled with different types of backup camera accessories. For maximum functionality, it’s important to choose the right backup camera specially designed for your car. A good place to start is by consulting your owner’s manual or your local dealership. When you have determined the right backup camera for your car, installing it is pretty easy and straight forward. By following the step-by-step guide listed below, you should have your backup camera working in no time.
Gather all the necessary materials.
Before you begin, make sure that you have all the necessary materials. You’ll need a rear view camera, a monitor, and a power source to connect them. If your vehicle doesn’t already come equipped with these items, it’s time to shop!
- Camera: The best camera will be one that has been designed specifically for automotive use. It should offer high resolution at night or in poor weather conditions (when visibility is limited), as well as daytime video quality that is clear enough to identify objects on the road ahead of time. In addition to these features being important in an emergency situation where lives are at stake every second counts, they can also help prevent accidents caused by distracted driving by allowing drivers who may otherwise become distracted by their cell phones or other devices keep their eyes on the road instead of looking down into their lap where there might not be any reason at all other than boredom leading them away from paying attention this way!
Check your car’s owner’s manual.
- Check the owner’s manual.
- Make sure the camera will fit safely on your car. Many vehicles have specific mounting points for a rear-view camera, so consult your manual to make sure it won’t interfere with safety features like air bags or seatbelts.
- Make sure it won’t interfere with how your car operates or looks
Locate a place to install the camera.
Now that you’ve decided to install a rear view camera, find a place on your car where you can install one. There are many options when it comes to choosing an area of the vehicle to mount your camera. You might mount it underneath one of the car’s windows, on the trunk lid, or even attached to your bumper. Mounting locations should be chosen based on how visible they are from inside and outside of the vehicle when reversing.
Prepare the camera installation site by cleaning and sanding.
Before you start the camera installation, it’s important to prepare the mounting location by cleaning and sanding.
- Remove any dirt or debris from the mounting location.
- Use a damp cloth to clean the mounting location. Make sure not to leave any residue on the surface of your car.
- Sand down any rough spots using fine grit sandpaper (no coarser than 400 grit).
- Use a vacuum cleaner with no brush attachment to remove dust from your car’s surface and then wipe down again with another clean rag if necessary.
Drill the necessary holes for mounting the camera.
- You’ll need a drill bit that is slightly smaller than the mounting screws.
- You’ll also need a drill bit that is slightly larger than the wire.
- Use a drill bit that is slightly larger than the camera itself to create a hole for its ribbon cable connector.
- Finally, use another drill bit (the same size as the bracket) to create space in which to mount it onto your rearview mirror or other desired location on your vehicle’s interior
Apply adhesive to the back of the camera, and mount it in place.
- If you’re using a brand new camera, apply adhesive to the back of the camera, and mount it in place.
- If you’re installing an existing rear view camera, use a high quality tape to attach your new rear view camera. You’ll need automotive-grade adhesive for this step as well.
- Use a high quality sealant around all edges of your rear view mirror assembly (including inside). A good rule of thumb is that if there’s no glue or tape holding something together, it should be sealed with sealant!
Connect all cables to the camera and directly to your car’s electrical system or through a harness, depending on what type of camera you are connecting.
- Connect all cables to the camera and directly to your car’s electrical system or through a harness, depending on what type of camera you are connecting.
- Run any wires through weather-proofing materials if needed.
Run cables from the camera along your vehicle’s bodywork to a location where you want to mount your monitor or display unit.
Run the cable along your vehicle’s bodywork to a location where you want to mount your monitor or display unit.
To run the cable through the interior of your vehicle, remove any trim pieces that are in the way. This might involve removing panels on the dashboard, glove box, or center console (depending on your car). If you’re planning on mounting your camera in an area where it can be seen by passengers as well as drivers (for example, if it’s mounted near an armrest), then make sure there aren’t any obstacles blocking your view from this angle when driving or sitting down.
Test out your rear view camera once everything is installed.
Once your rear view camera is installed and functioning, it’s time to test it out. You don’t want to get into an accident because of a faulty installation.
Test the camera at night. Test the camera during the day. Test the camera when there are other vehicles around you or not around you at all. Test how far away objects appear on screen (closer objects will appear larger than farther ones). Finally, test the angle of view: if this is a backup camera used primarily for parking purposes, then take note of how much of your surroundings can be seen with each maneuver (if possible).
Installing a rear view system takes time and patience, but is ultimately worth it!
Installing a rear view system takes time and patience, but is ultimately worth it! The installation process itself can be frustrating, especially when you’re trying to get all the wires connected. But once everything is in place and your car starts up for the first time with the new camera installed, you’ll feel better about your purchase. After all, no one wants to get into an accident because they couldn’t see what was behind them on the road.
I hope that this guide helped you decide if installing a rear view camera is right for you! If so, make sure to check out my other blog posts on how to install tail lights or how to replace fuses.
 Spot Dem Everything About Cars


